

Welcome!
After reading all the programming basics, we are ready to sum up the information and write the first program.
There is still a lot to learn, and the minimum required code in order to make a Java program contains elements that we didn’t mention yet.
For now – just ignore anything that is not mentioned here – we will explain everything as we continue.
Note that all our instructions are compatible with Eclipse IDE for Java Developers. You can find the installation instructions here.
If you are using a different IDE – you’ll need to do the required steps using your IDE.
Creating a new project
- First – start Eclipse IDE.
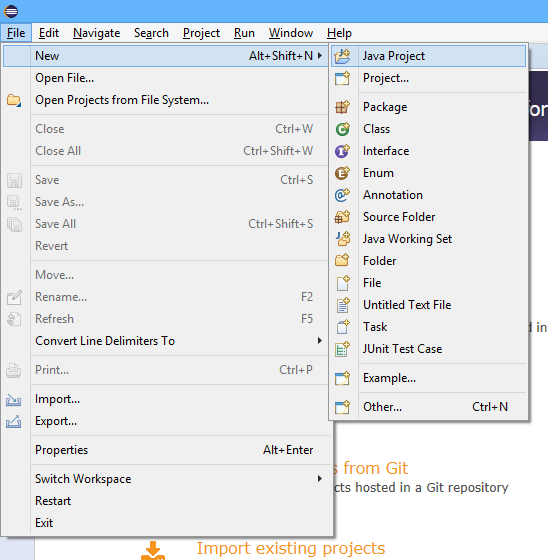
- Create a new Java project by clicking on the “File” menu, then “New”, and then “Java Project”.
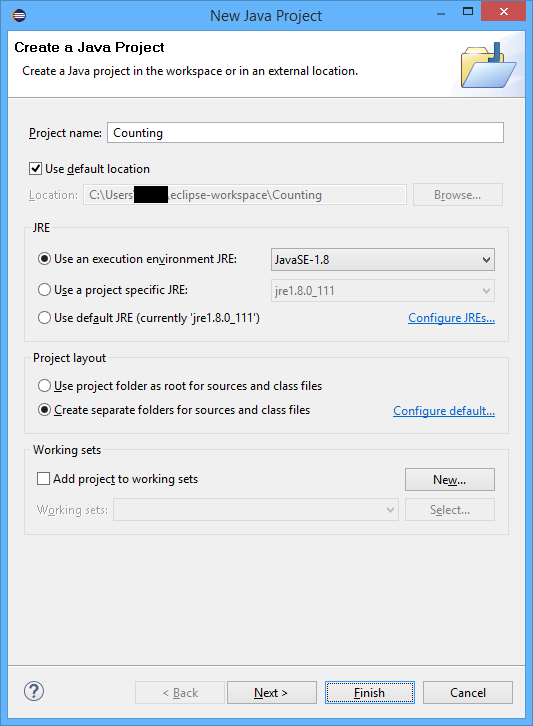
- Write the name of the new project – we will use “Counting” to be our project name, and click on Finish:
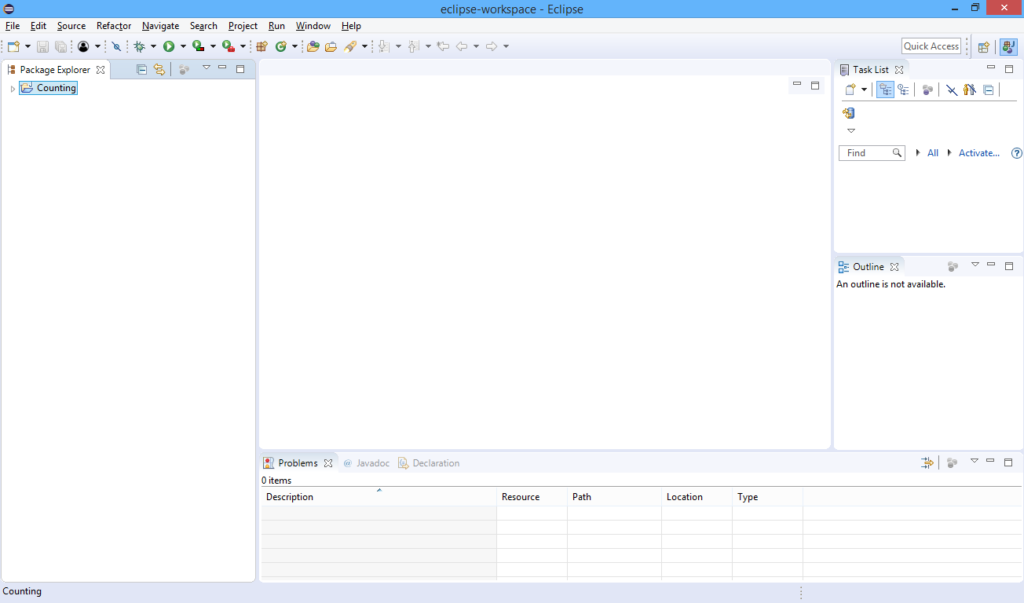
- If you still see the “Welcome” screen after this step – click on the X next to the “Welcome” tab. You should get something similar to this:
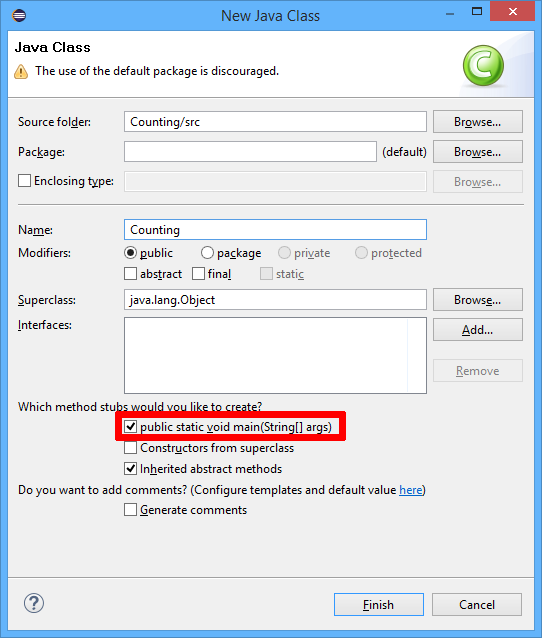
- Creating the main class and entry point:
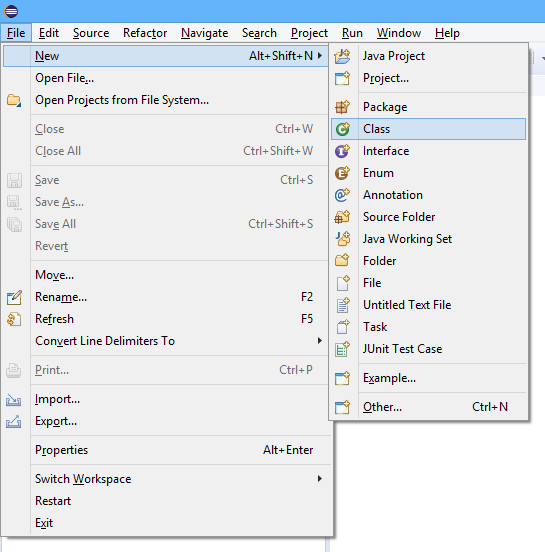
Click on the “File” menu, then “New”, and the “Class”:
Set the name of the class to be “Counting”, and check the “public static void main(String[] args)” option.
This will create our program entry point.
And click on “Finish”.
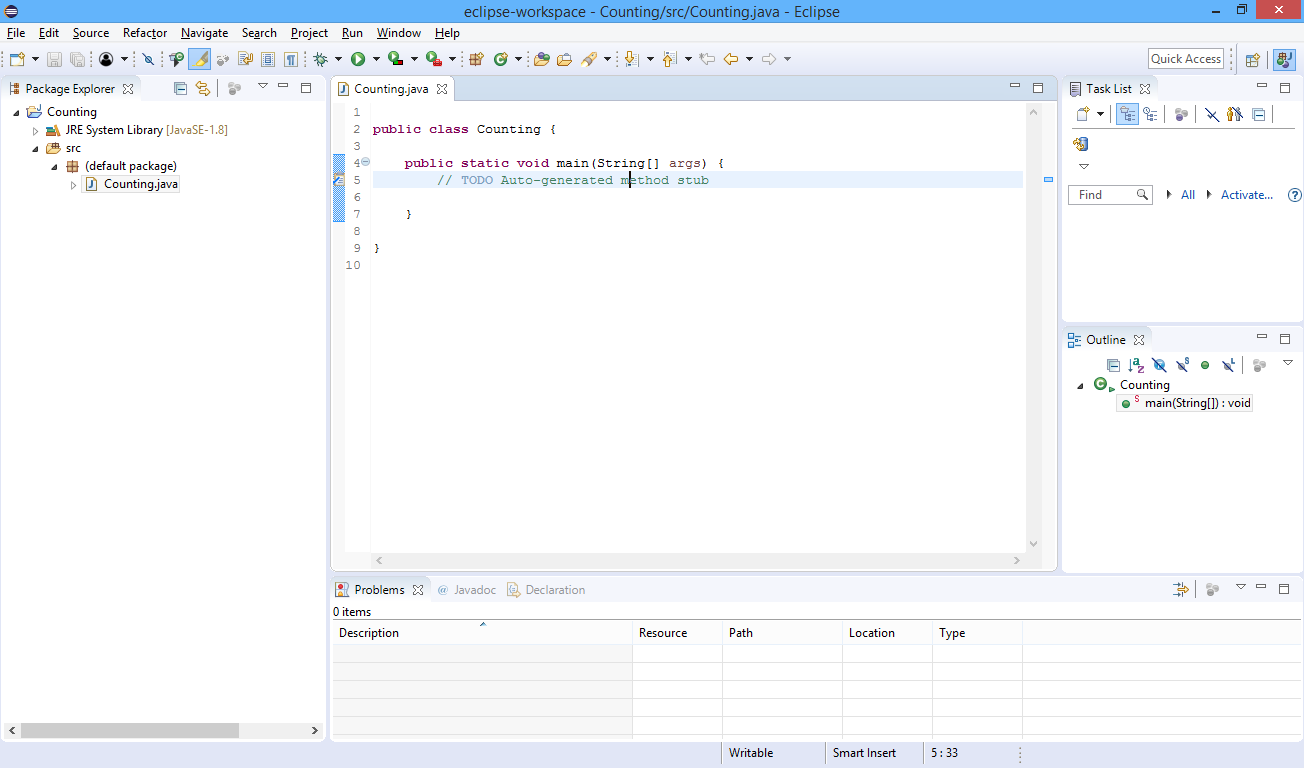
- You should get the following screen:
- Now we are ready to write the first program which will be our Counting program.
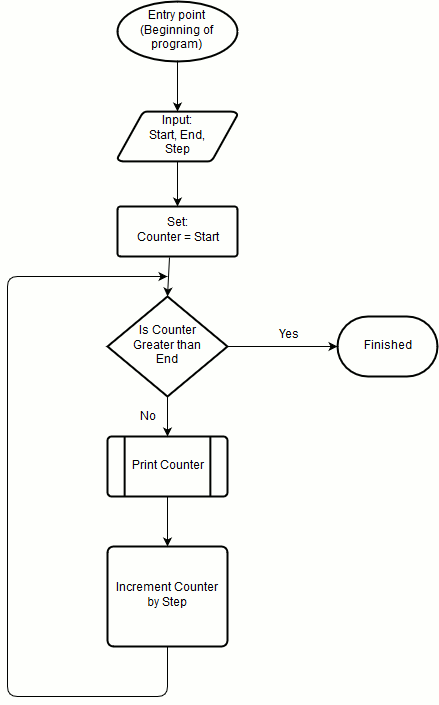
We will implement the counting flowchart step by step.
Our entry point is the “main” function that was automatically generated for us when we added the class to our project (we will explain what are classes and functions in the next pages).
The next step is the input of the Start, End and Step parameters. In this example – we will use constants instead of actually get them as input.
We will use a variable for each one of these parameters. Here is how we declare and set the variables’ initial values:
int start = 1;
int end = 10;
int step = 1;
The next step is to set the value of the Start parameter into the Counter variable. We will declare and set the counter variable:
int counter = start;
The next step is to write a condition that checks if the counter is higher then our End parameter. You can see in the flowchart that this condition is actually a “while” condition, that will make the program to keep counting “while counter is not grater then end”. There are several ways to write this condition, but the most common way will be writing: “while counter is less than or equal to end”. We will write our “while” like this:
while (counter <= end) {
You can see that we already opened the “while” scope by adding the left curly bracket at the end of our while condition.
Now – we will write the commands that need to be executed inside the while condition, which are “print counter” and “increment counter by step”.
We will use Java’s System.out in order to write our counter as our program’s output. The System.out has a “println” function that writes a variable to the output, and adds a new line – so we will print each one of our count numbers in a line of its own.
System.out.println(counter);
We will use the assignment and addition operators in order to increment our counter.
counter = counter + step;
The above statement says: Add the value of step and the value of “counter” and put the result in “counter”. The plus sign instructs the program to add the two values and the equal sign says to put the result of what is right to the equal sign to the variable which is left to the equal sign.
We end the “while” scope by adding right curly bracket.
}
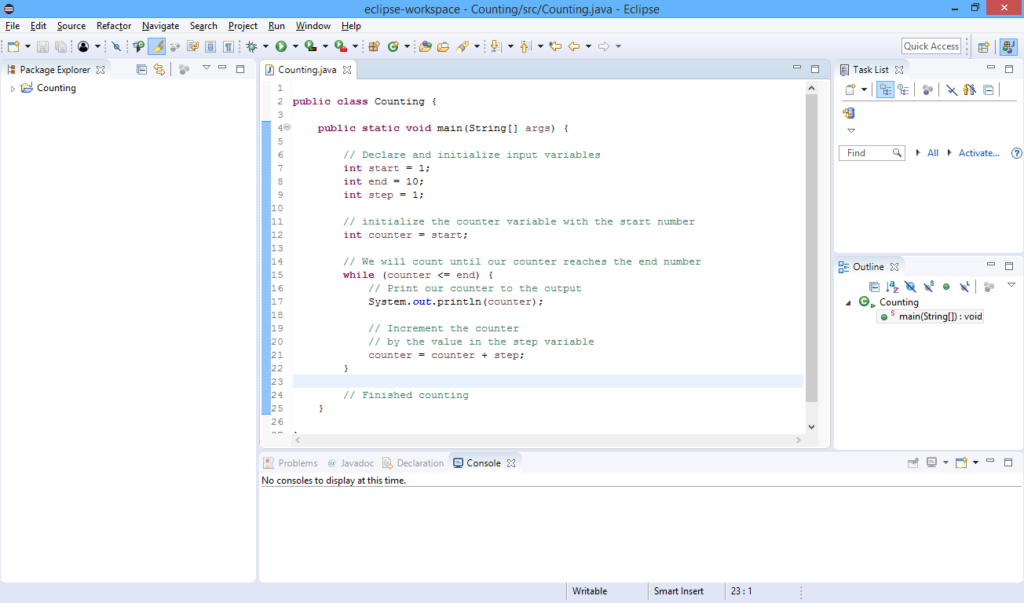
The entire program sum up to the following:
// Declare and initialize input variables
int start = 1;
int end = 10;
int step = 1;

// initialize the counter variable with the start number
int counter = start;

// We will count until our counter reaches the end number
while (counter <= end) {
    // Print our counter to the output
    System.out.println(counter);

    // Increment the counter
    // by the value in the step variable
    counter = counter + step;
}

// Finished counting
If we will not add anything after the “while” scope – the program will just finish as we reach the end of the scope of the “main” function.
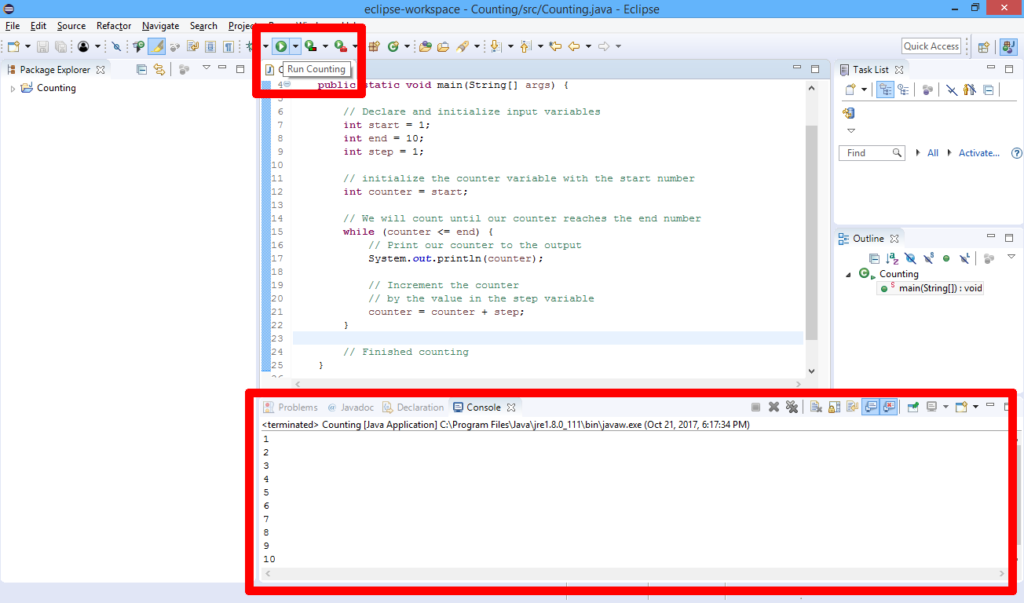
This is how the program looks inside the Eclipse IDE:
Running the program
The Eclipse IDE allows you to run the program by clicking on the “Run” button, which is the button with “Play” sign inside a green circle.
After clicking on the “Run” button the program will run, and its’ output will be written to the “Console” tab in the lower pane of the window.
This sums up the programming basics section.
We will continue to use, learn and practice these basics, while continue to learn more programming concepts and practices.